 Northstride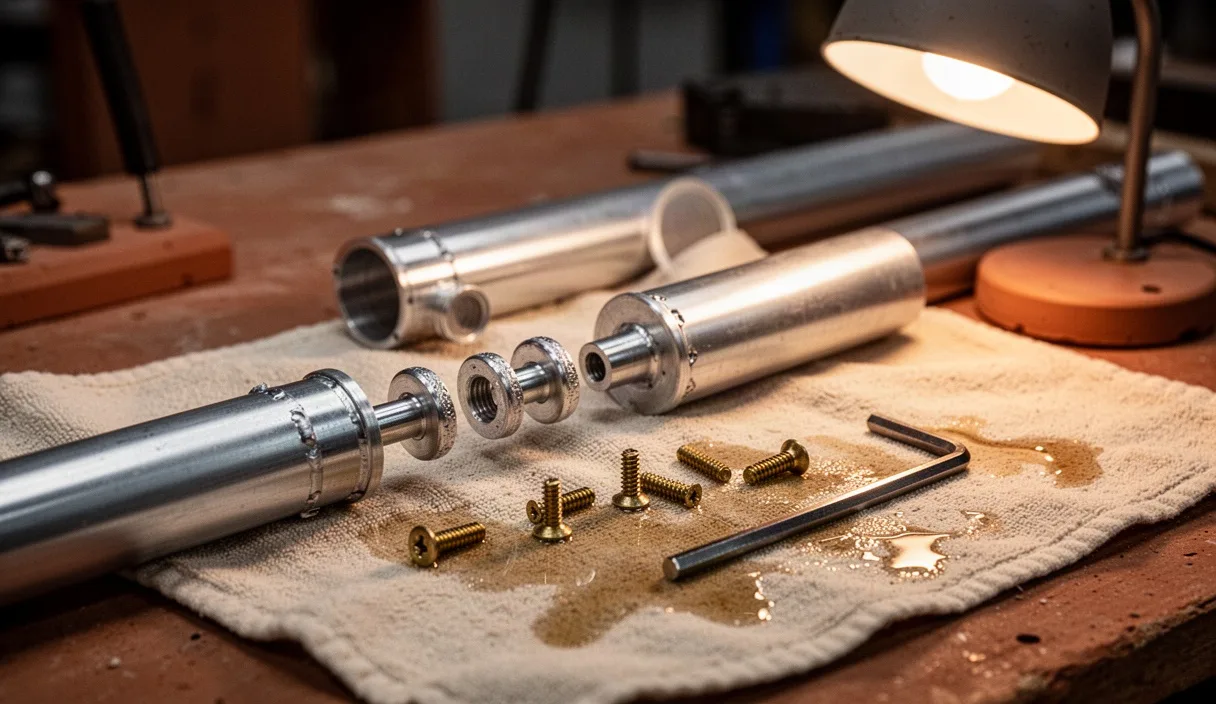

When a pole joint slips beneath your weight on a steep descent, the fault rarely lies with the engineering of the lock. Telescoping pole shafts operate on tight mechanical tolerances, depending on clean friction between nested tubes of drawn 7075-T6 aluminum or roll-wrapped carbon fiber. When mud, mineral-heavy river water, or fine granite dust enters those joints, the mechanical interface breaks down. The wedge slips, the cam lever binds, or the alloy begins to pit under moisture held hostage inside the tubing.
In our workshop, we handle hundreds of poles each season that have seized, jammed, or lost their holding power. Most do not need factory replacement parts; they need systematic bench maintenance. By breaking down the assemblies, understanding how the plastic expanders and aluminum collars mate against tubular walls, and clearing away hidden debris, we can restore reliable clamping force to both twist-lock and external cam-lock mechanisms.
Disassembling aluminum and carbon shaft joints
Before any solvent or brush touches the shafts, the pole must be separated into its individual nesting sections. With external cam-lock designs, this process is straightforward: release the lever fully, back off the tension wheel or hex bolt three to four turns, and slide each section downward out of its receiving sleeve. Take note of the plastic stop-bushings or internal split shims seated near the base of the inner tubes; these small plastic collars keep the tubes centered and prevent you from pulling the sections past their maximum extension mark during field adjustments.
Twist-lock assemblies require a counter-clockwise rotation until the internal expander plug relaxes its outward bite. If the expander keeps turning with the shaft without unthreading from its wedge, pull outward gently while twisting to induce enough friction against the inner wall to break the thread loose. Once separated, inspect the plastic expander nut, the threaded central spindle, and the split wedge. Carbon and aluminum poles behave differently during disassembly, demanding distinct care at the bench.
| Shaft Material | Primary Wear Surface | Key Structural Vulnerability | Disassembly Precaution |
|---|---|---|---|
| 7075 Aluminum | Inner tube wall, expander face | Galling, ovalization, pitting | Never pry open split collars with metal drivers |
| Roll-wrapped Carbon | Outer clear resin layer | Crush fractures, edge delamination | Avoid twisting tubes past collar detents |
Examine the lower lip of each carbon section under strong raking light. Look closely for tiny micro-fissures or fraying resin fibers along the cut ends. Carbon tubes are strong along their longitudinal axis under compression, but they are vulnerable to radial crush forces and impact chipping. Aluminum shafts, on the other hand, show wear through surface scoring: bright, shiny tracks scraped into the matte anodized finish where grit has been dragged along the tube wall.
Removing grit and oxidation from internal tubes
The interior bore of a trekking pole section is an unanodized or lightly treated metal or resin surface. When grit enters the overlap, it acts as a grinding compound that hollows out the tube diameter, reducing the locking mechanism's reach. In aluminum poles, moisture trapped against minerals causes galvanic oxidation, visible as a chalky white powder that seizes plastic threads and welds expanders to tube walls.
To clean the interior bore, we use a rigid brass or stiff nylon bore brush sized for a 16 mm or 18 mm tube, attached to a gun-cleaning rod or a long hardwood dowel. Avoid using steel wire brushes, which scratch deep grooves into soft aluminum and peel the epoxy matrix away from carbon fiber cloth.
- Dry-brush the interior: Run the brush through the entire length of each tube three or four times to break up caked dirt and crusty white aluminum oxide. Tap the open end of the tube onto a wooden workbench to dislodge the loose powder.
- Flush with solvent: Saturate a clean cotton patch with 91 percent isopropyl alcohol. Wrap the patch over the brush or push it through the shaft with a dowel. Isopropyl alcohol dissolves dried grease, tree sap, and mud deposits without leaving an oily film or softening the adhesives holding the pole tips and grips.
- Degrease the plastic hardware: Soak the twist-lock expanders or external cam shims in a small dish of warm water mixed with a few drops of mild dish soap. Scrub the threads with an old toothbrush. Avoid acetone, mineral spirits, or petroleum solvents, as these can embrittle nylon expanders and cause ABS plastics to swell.
- Dry wipe: Push clean, dry cotton cloth through the internal tubes until the patches emerge without black soot, rust-colored silt, or white aluminum powder.
Crucially, never spray silicone oil, lithium grease, or penetrating oils into the interior of a pole tube. Twist locks rely entirely on dry surface friction between the expanding plastic nut and the raw tube wall. Any oil introduced here will render the locking wedge useless, causing the pole to telescope shut under modest downward body weight.
Adjusting cam lever tension with hand tools
External cam locks, often referred to as lever locks, work by squeezing a split aluminum or plastic collar around an inner tube. As the eccentric profile of the cam swings shut, it draws the collar tight. Over miles of trail vibrations, the adjustment screws on these levers slowly drift outward, lowering the clamping force until the lower section creeps upward while hiking.
Proper adjustment requires matching the clamping force to the material of the inner shaft. If you over-tighten a cam collar on a carbon tube, the concentrated hoop stress will crush the resin matrix, creating an invisible internal fracture that can snap without warning. To dial in the clamp, keep the cam lever open and turn the tension wheel or cross-head screw clockwise by small increments, roughly an eighth of a turn at a time.
Close the lever to test the tension. You should feel smooth, steady mechanical resistance through the final 30 degrees of the lever swing. The clamp should close firmly using the flat pad of your thumb, without requiring you to push off against the shaft with your fingers or rap the lever against a rock. If the closing action leaves a deep red indentation on your skin or requires two hands to throw, the collar is too tight and risks deforming the outer tube.
Once adjusted, test the hold against a solid workshop floor. Set the pole to your walking height, place both hands flat over the top of the grip, and lean downward with firm body weight, putting roughly 35 kilograms of downward force into the tip. If the inner tube slips into the outer sleeve by even a single millimeter, unseat the cam, turn the adjustment screw another 45 degrees clockwise, and re-test. If the screw lacks a nylon-threaded locking insert and repeatedly backs out during hikes, apply a single tiny drop of medium-strength blue thread-locking compound directly to the screw threads, taking extreme care not to get any compound on the plastic housing.
Fixing frozen twist locks without crushing tubing
A frozen twist lock is almost always the result of fine grit lodged in the threads of the expansion cone, or white aluminum oxidation cementing the split wedge to the internal wall. The natural instinct is to grab a pair of slip-joint pliers or a pipe wrench to force the section to turn. Doing so will instantly crush the thin-walled aluminum tube out of round, permanently destroying its ability to telescope, or split a carbon fiber tube along its weave.
Instead, use methods that increase surface friction without concentrating crushing loads, combined with thermal expansion principles.
Friction wraps
Wrap two wide strips of textured rubber sheet, such as a piece of bicycle inner tube, a plumber's strap wrench, or silicone jar-opening pads, tightly around the two stuck sections. Position your hands directly above and below the internal joint to minimize twisting torque across the unsupported length of the shaft. Grip the rubber wraps with your bare hands; the added traction allows you to apply full rotational torque without marring the surface finish or pinching the circular profile into an oval.
Thermal separation
If friction wraps alone do not break the bond, take advantage of the thermal properties of metal. Aluminum expands and contracts rapidly with temperature changes. Run cool tap water over the inner lower tube for 60 seconds while applying warm water, around 45 degrees Celsius, to the outer overlapping sleeve. The outer tube will expand outward slightly while the inner tube and internal expander contract, breaking the crystalline grip of dried silt or corrosion.
Mechanical vibration
When corrosion has locked the plastic threads to the metal shaft, gentle vibration can crack the bond. Rest the joint against a block of softwood on your bench. Using a small rubber or rawhide mallet, tap the outer tube lightly around its circumference at the point where the expander sits inside, roughly 50 mm above the joint line. Rotate the tube between light taps. Do not strike the pole hard enough to dent the metal; you are simply creating acoustic shock waves through the metal wall to shake loose the powdery oxide layer binding the wedge.
Drying practices after walking through marsh and rain
The single greatest cause of pole joint failure is storing poles while they are assembled and damp. Capillary action draws bog water, rain, and stream sediment deep into the narrow void between nested tubes. Once trapped, this water cannot evaporate through the tight tolerances of closed cam collars or expander plugs. Inside an aluminum shaft, the stagnant, oxygen-poor water causes deep pitting corrosion that weakens the tube walls within three to four weeks.
Whenever you return from a wet outing, make a habit of stripping the poles down completely. Do not merely loosen the cams or unscrew the twist locks; pull every section free of its sleeve.
- Wipe down outer surfaces: Run a dry micro-fiber cloth along the exterior of every tube to remove surface moisture and grit lines before they dry into a hard crust.
- Shake out the tubes: Hold each hollow tube vertically and tap it lightly against a soft rag on the floor to clear any water pooling inside the lower tips.
- Air dry vertically: Stand all disassembled sections upright in a clean, warm corner of your workshop or living room. Keep the open ends facing upward to allow warm room air to draw moisture out through natural convection. Leave them separated for at least 24 hours.
- Inspect internal components: Before slipping the tubes back together, feel the inside of the sleeves with a dry fingertip or a clean wooden dowel wrapped in tissue paper. If any dampness remains, let them dry longer.
Avoid placing damp carbon or aluminum poles against direct, intense heat sources such as wood stoves, cast-iron radiators, or baseboard heaters. Excessive heat can degrade the structural bonding epoxies used in carbon shafts and may soften the thermoset glues that hold the carbide tips and synthetic handles to the tubing.
Common mistakes
We regularly see good equipment damaged by well-intentioned maintenance habits that do not account for pole mechanics.
- Applying lubricant to solve sticking locks: Spraying light oils or wet lubricants inside the shafts guarantees that the joints will fail to hold weight when you lean on them.
- Clamping bare tubes in a bench vise: Standard metal vise jaws exert extreme point pressure, flattening circular tubing within seconds. If you must use a vise, use dedicated rubber-lined v-block jaws designed for bicycle seatposts.
- Over-tightening cam levers with pliers: External levers are meant to be serviced with small hand tools. Forcing a lever closed with pliers will snap the nylon pivot ears or crack the cam lobe clean off the pin.
- Ignoring bent lower shafts: Attempting to force an aluminum tube with a slight bend back through an external cam collar will score the inner plastic bushings and shave off the sealing lip. If a tube is bent beyond 5 degrees, replace the individual section rather than forcing it through the joint.
Next steps
To keep your gear dependable, establish a routine based on your trail hours rather than waiting for a lock to slip on a steep grade. Disassemble and dry your poles after every wet outing, and run a dry bore brush through the shafts after every 30 to 40 trail days to clear out accumulated dust before it abrades the wall thicknesses.
Take ten minutes at your bench this week to inspect your primary set of poles. Pull the sections apart, look down the tubes toward a bright light to check for internal scale, verify that the cam screws hold their set tension without creeping, and replace any expander plugs whose plastic threads have stripped or flattened out. Clean, dry hardware gives you the friction you need to trust every placement.